🔑 Setting a Master Client for Keycloak Integration
To perform operations such as creating users, groups, realms, clients, roles, group roles, and more using Feijuca.Auth.Api, you must configure a new client within the master realm in Keycloak. Follow the steps below:
1. 🖥️ Access the Keycloak Admin Console
- Log in to the Keycloak Admin Console.
- Select the master realm.
- Click on Clients.
- We will create a new client that will be used by Feijuca.Auth.Api.
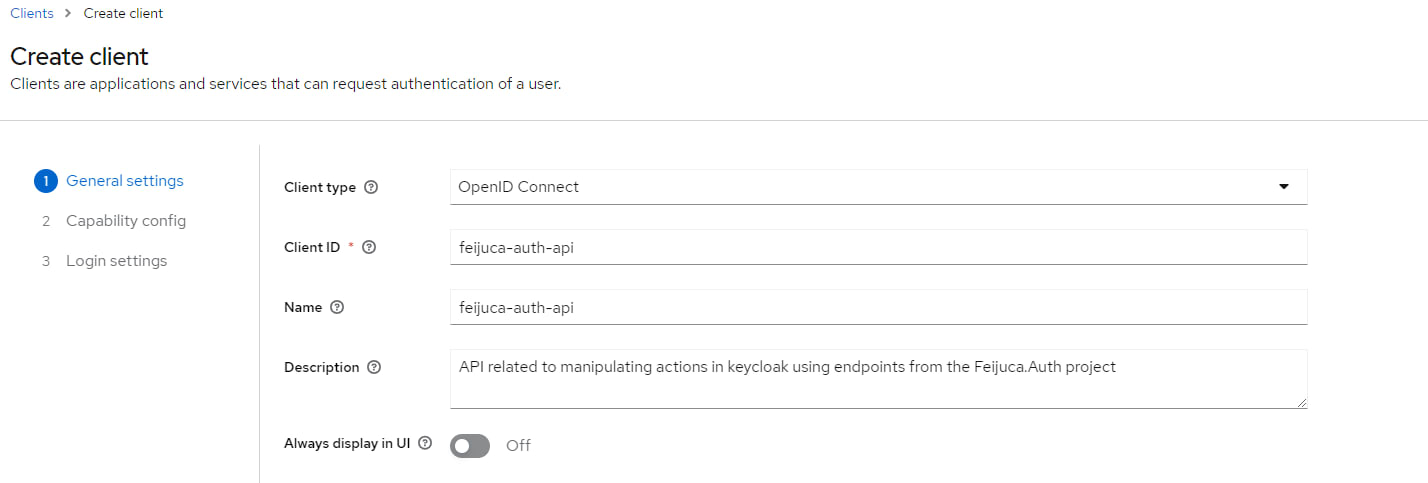
2. 🛠️ Create a New Client in the Master Realm
⚠️ Please use the master realm, and replicate the values exactly as shown below.

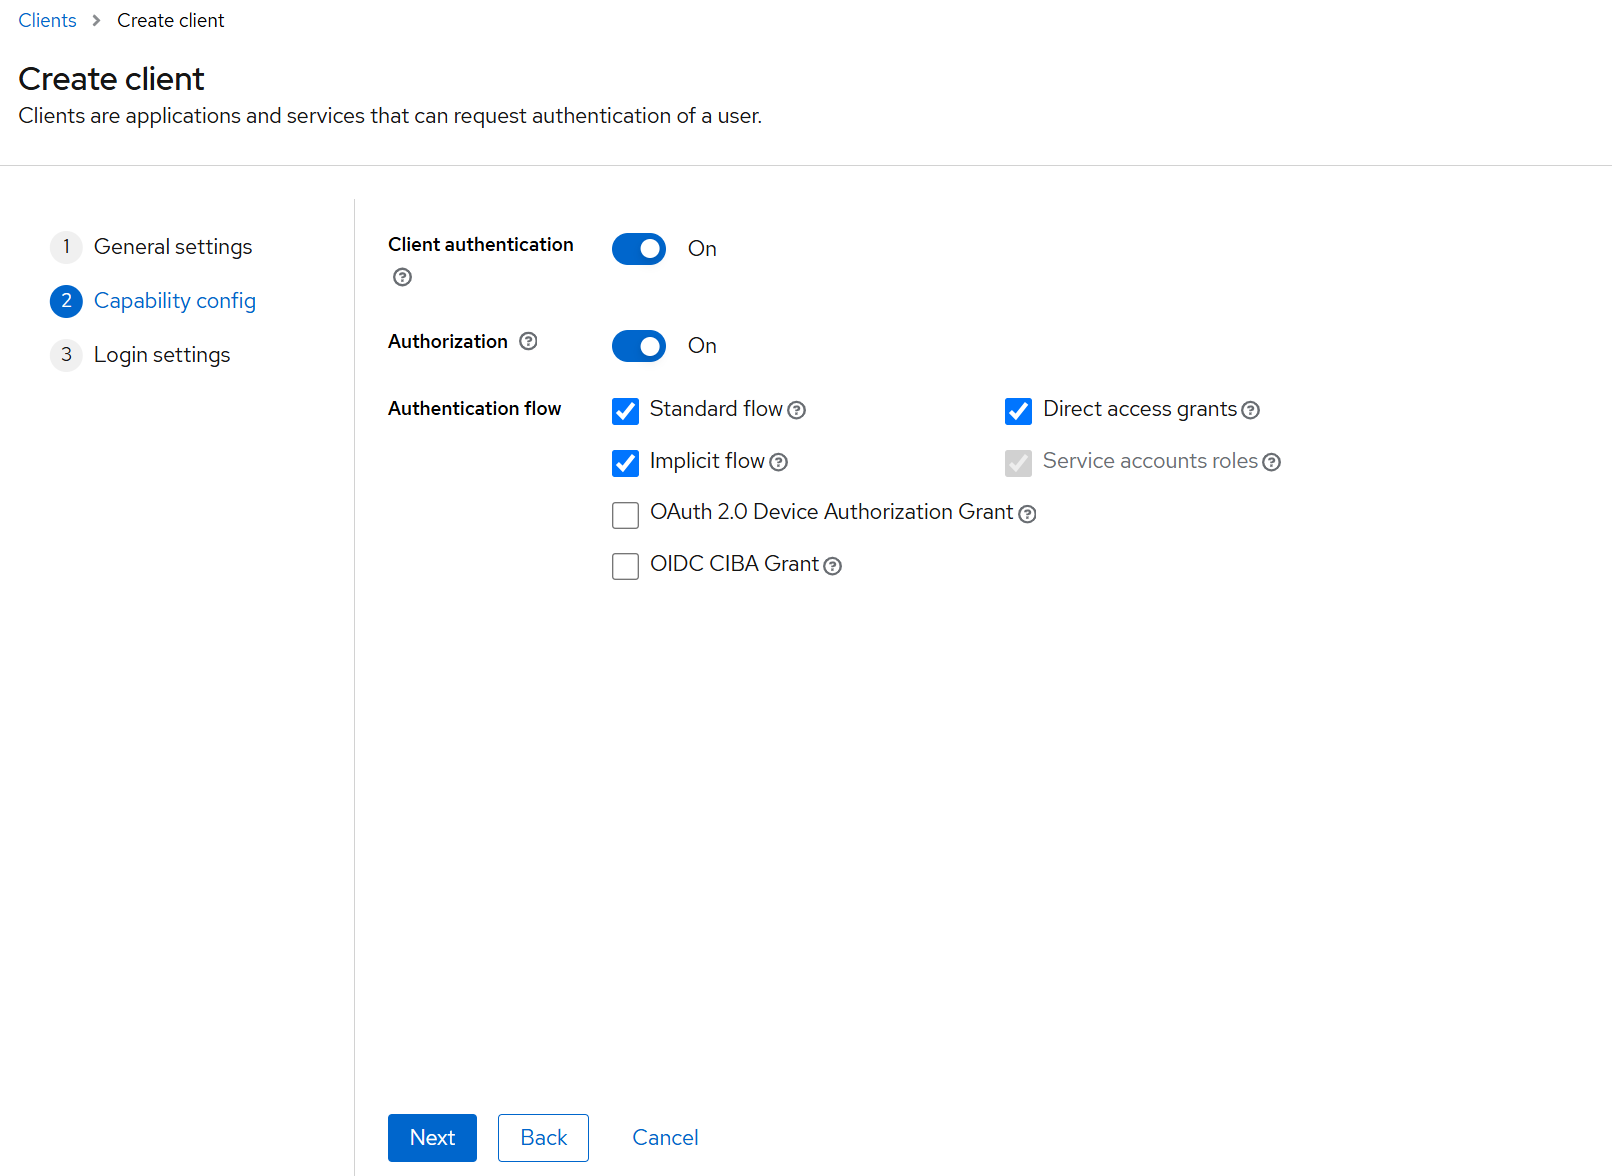
3. ⚙️ Configure the Client Capabilities
- Match your configuration with the example below:
4. 🔐 Login Settings
- Leave the login settings as default and proceed to create the client.
5. 🛡️ Assign Service Account Roles
- After creating the client, click on it and go to the Service Account Roles tab.
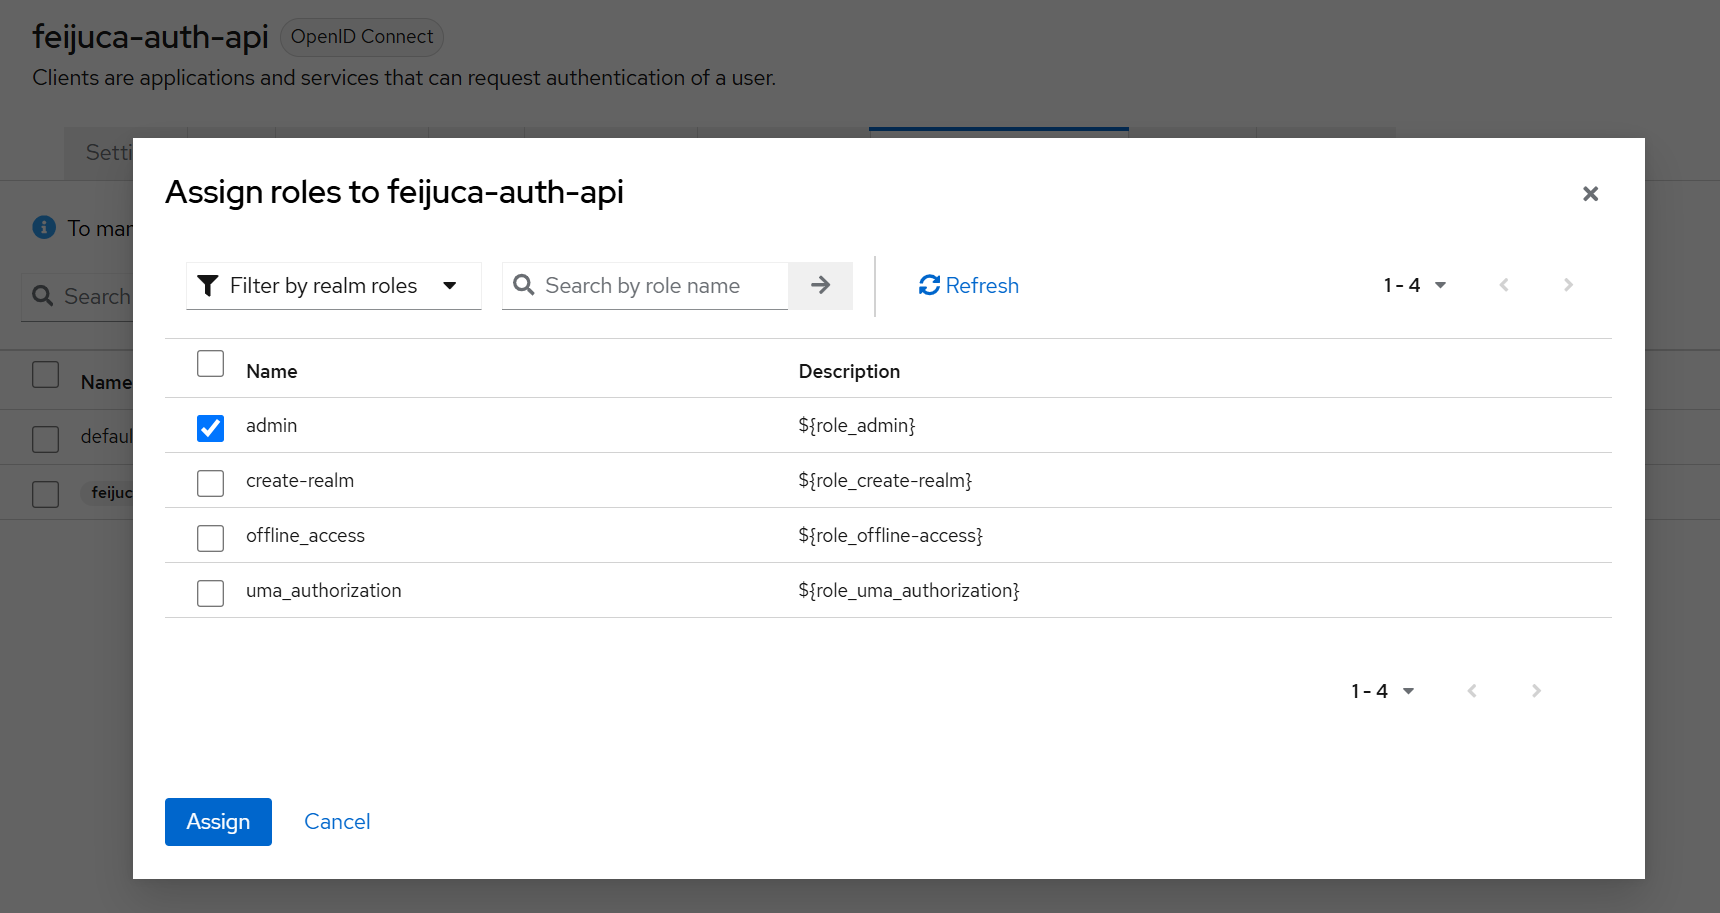
- Click on Assign Role.
- Assign the necessary admin roles to allow operations like:
- User creation
- Group and role management
- Realm and client creation
Remember to click on Filter by realm roles to see the right option to be added.
✅ Done! Roles Assigned to Service Account
After assigning the required roles, Feijuca.Auth.Api will be able to make authenticated requests to the Keycloak API and manage users, groups, clients, roles, realms, and more.
➡️ Next step: Configuring the Feijuca.Auth.Api

